Gasket Installation Procedures: Best Practices
This blog provides guidance to maintenance operators, engineers and fitters to ensure successful gasket installation and assembly of bolted flange connections. However always check plant-approved installation procedures first.
The successful operation of a gasket depends upon a multiplicity of factors including the style and quality of the gasket material, but also the medium being sealed, the flange design, the amount of pressure applied to the gasket by the bolts and how the gasket is assembled onto the flanges and tightened. Very basic causes often lead to leakage in bolted joints, and in most cases, it is not just the gasket but also the human element. Users should evaluate all conditions to validate the products are suitable for the intended process.
Tools Needed
Specific tools are required for cleaning the flange and tensioning the bolts. Always use standard safety equipment and follow good safety practices. The following tools are required for removal of the old gasket and installation of the new gasket:
- Calibrated torque wrench or hydraulic tensioner
- Brass wire brush
- Personal safety equipment
- Lubricants for the bolts (if specified)
- Other plant-specified equipment
Clean & Examine
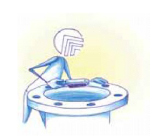
Examine the flange surfaces, fasteners (bolts or studs), nuts and washers to ensure they do not have any serious defects. Replace any components if found to be defective. If in doubt, seek advice from a qualified expert.
Gasket Dimensions
Ensure the gasket is the correct size.
The inner diameter of the gasket should not be smaller than the inner diameter of the flange.
Do not use a thicker gasket material or “stacked gaskets” to solve a gasket problem without first consulting the manufacturer.
Cut the bolt holes slightly larger than the bolts to simplify the centralization of the gasket.
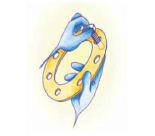
Gasket Storage
The gasket should be stored horizontally to avoid tensions and warping. Ideal storage conditions are in a clean area (ideally in a plastic bag) at <75°F, 50-60% humidity, and out of direct light.
All types of gaskets should be handled with care. Carry gaskets carefully, ideally in some form of protective cover. Protect the surfaces and never bend or write on the gasket.
Bolts, Nuts, & Washers
Use a nut which has a specified proof load 20% greater than the ultimate strength of the fastener. Use standard threads, rather than fine, and use the correct lubricant.
Use the same material for the washers and the nuts. Use washers to bridge slotted or oversized holes, even interface forces between joint components and/or reduce problems of fatigue by spreading the load placed by the fastener on the joint.
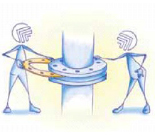
Gasket Installation
Do not use joint compounds or release agents on the gasket or seating surfaces unless specified by the gasket manufacture as this can lead to reduced surface friction and higher relaxation.
Bring the flanges together ensuring the gasket is not pinched or damaged.
Lubrication of Bolts
Uniformly apply lubricant to the bolt and the nut threads as well as to the face of the nut to reduce friction during tightening.
DO NOT contaminate the gasket or flange surfaces with lubricant. Be sure that the recommended service temperature of the lubricant is within the process service temperature limits.
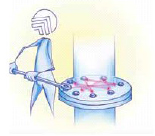
Bolt Tightening
Gaskets installed with high seating stresses exhibit a longer service life than gaskets installed with lower compressive stresses.
Tighten all nuts initially by hand. To achieve even compression of the gasket, use a calibrated torque wrench or other controlled tensioning device, and make three complete passes each in a crisscross bolt pattern to the required torque as follows:
- Torque each nut to approximately 30% of the required torque.
- Torque each nut to approximately 60% of the required torque.
- Torque each nut to full torque.
Continue with one final pass, torqueing the bolts in a clockwise sequence until all torque is uniform. Large-diameter flanges may require additional tightening passes.
Retightening
Never retighten compressed fiber gaskets after they have been exposed to elevated operating temperature or extended operating temperatures.
Re-torque fasteners exposed to aggressive thermal cycling once the joint is at ambient temperature.
All re-torqueing should be performed at ambient temperature and atmospheric pressure.
Re-Use of Gaskets
For safety reasons, NEVER re-use a gasket.


